How to Start a Painter and Decorator Business?

Starting a painter and decorator business can be a rewarding venture if you have the skills and passion. It requires time and effort, but there are plenty of opportunities out there to bring in work if you remain committed. You can enjoy the freedom and flexibility of being your own boss and get to flex your creative skills, while meeting a wide range of people.

If you love the idea of running your own company, setting your own schedule and the variety of constantly changing working environments, the profession certainly gives you all of this. You’ll need to take a sustained approach to building a client base and reputation, as patience and consistency are key. Of course, it all starts with offering a high-quality service. However, there’s so much more to building a successful business that will give you an attractive income.

In this guide, we’ll talk you through how to become a painter and decorator, with advice on the kind of money you could earn and ways to eventually grow your business.

Do painters and decorators make good money?

Painters and decorators can earn a good living from their trade. You can work on ways to increase your earnings over time. For example, you could research the most profitable areas to specialise in, charge higher rates with experience, and focus only on your local area to keep travel costs down.

It’s well worth knowing what kind of income you could make from your profession before you decide how to market your business and how you’ll source customers. If you’re wondering how much self-employed painters and decorators earn, you can consult government resources and trade websites for a good indication.

However, as a rough guide, sole traders can earn around £37 an hour, £296 a day, or £54,576 a year, on average. This increases if you set up a limited company, to an average of around £48 an hour, £384 a day, or £70,802 a year; factor in the additional costs from this figure, such as corporation tax. If you employ staff, your outgoings will also include their wages.

Read more on how much painters and decorators earn.


Build your business with a methodical approach

Here is a step-by-step guide to how to start painting and decorating for a living. If you already work in this profession for an existing company, you can follow these tips to find out how to set up on your own.

Review your current skills and qualifications

You don’t need to be qualified to be a painter and decorator, but you will need to demonstrate your experience. The first thing you’ll want to do is make sure you have the necessary skills and knowledge in painting and decorating.

If you don’t have any past work under your belt yet, consider taking courses or gaining experience through apprenticeships. Maybe you could take on work for an established painter and decorator before you become self-employed, to give you some stability of income and learn from someone else as you hone your talents.

Decide what kind of services you will offer

Knowing your strengths is key. You can either choose to do more of the type of jobs you love, find out what is likely to be most profitable for you, or understand what type of jobs are most likely to be available in your area.

Here are some examples of painting and decorating services you can specialise in:

  • Basic painting
  • Painting with effects (e.g. marbling)
  • Traditional finishes
  • Wallpapering (including other materials such as vinyl)
  • Minor repairs
  • Carpentry
  • Tiling
  • Flooring

Decide who your ideal customer will be

There are a range of ways you can approach this, so you don’t have to rely on guesswork to find out the best way to secure a steady stream of work. Once you know what you’ll offer, you can research your ideal customer base and assess your competition.

Will you offer your services to commercial or residential clients? What type of buildings have the most potential to bring you business and a healthy fee? Find out how many other people are offering those services, and look at what kind of buildings are in your area. If you focus on working in your own region, you can develop a strong local reputation.

Create a solid business plan

A well-thought-out business plan is essential. It will give you a clearer understanding of how you will approach building a company and securing work, while helping you secure financing if needed. At the very minimum, it should outline the following:

  • Your short-term and long-term business goals
  • Associated costs, e.g. any requirement investment, training, vehicle, materials and tools
  • Your specific services
  • Your target market
  • Your pricing strategy
  • A marketing plan outline
  • Financial projections

Register your business correctly

When establishing what you need to be a self-employed painter and decorator, registering your business is one of the most important first steps. Ascertain the appropriate legal structure for your business (either a sole trader or limited company) and register it with the government. Obtain any required permits or licenses for your area. There are advantages and disadvantages to both, but when starting out it may be more likely that you’ll meet the requirements of a sole trading company.

As a sole trader, you’ll be able to keep everything you earn after tax. You can register as a limited company when your income is over a certain threshold, which could give you more credibility. Some bigger clients may only do business with limited companies.

Invest in the right equipment and supplies

Purchase the necessary painting and decorating equipment and supplies. This includes brushes, rollers, ladders, drop cloths, paint, and wallpaper. Aim to invest more in items where the materials need to be high-quality, which will help you deliver a professional service. For anything that can be bought at a lower price without compromising the results, make sure you shop around for the best value.

Determine your pricing and how you want to be paid

Be intentional with how you will price your services. You can do your research to find out how much others charge, but also consider factors such as the cost of materials, labour, overheads, and your desired profit margin. Use your business plan projection as a guide, looking at how much you’ll need to earn each month in order to meet your desired annual income. Decide on payment terms and methods, including whether you will require upfront deposits.

Start marketing your business online and offline

Develop a detailed marketing strategy that will help you to attract clients through various channels. At the very least, you should create a professional website, set up social media profiles, create business cards and flyers, and network with local real estate agents, builders, and interior designers. Find out what networking events are in your area, and join local and national business federations which encourage referrals between members.

Continously add to your portfolio

Showcase your work through a portfolio of completed projects, which can sit on a dedicated page within your website. You could also post regular updates on sites such as LinkedIn and Facebook to keep people informed on your latest work, encourage conversation about your services and generate enquiries.

Include before-and-after photos to demonstrate your skills and the quality of your work. This portfolio will be a valuable tool when meeting potential clients, as they can easily see what you do rather than taking your word for it.

Familiarise yourself with estimating and bidding

Learn how to provide estimates for projects. This is a useful alternative to giving quotes, as they can’t be changed if the work ends up taking longer or incurring unexpected costs. This can leave you out of pocket and doesn’t establish you as a professional who’s being paid what they deserve, which can diminish the respect people have for your business.

Be transparent with clients about the scope of work, costs, and timelines. Providing detailed and competitive bids can help you win contracts.

Create a reliable template for client contracts

Always have a written contract in place before starting any project. The contract should outline the scope of work, timelines, payment terms, and any other relevant details. This helps protect both you and your clients, giving you both a clear vision of what to expect and what the finished outcome will look like.

Contracts serve the purpose of letting clients know exactly what they’re getting in return for their investment and minimising the chance of any disputes around payments or delivery dates further down the line.

Create a thorough accounting system

Set up a system to manage your finances, including tracking income and expenses, invoicing clients, and paying taxes. Consider hiring an accountant if you need support in this area. If you have the know-how and confidence to take care of your own finances, you can use accounting software to help you stay organised. Read our blog on Accounting tips for small businesses.

Develop your knowledge of safety and regulations

Make sure you are highly knowledgeable about safety regulations and best practices in your industry. Anyone you hire will also need to know these inside out, in order to follow guidelines and prevent accidents. You’ll need to comply with workplace health and safety regulations, as well as exercising fire safety. Pay attention to areas such as the use of equipment, protective clothing, and processes for reporting accidents.

Always provide high-quality customer service

Never underestimate the importance of excellent customer service for your reputation. Satisfied customers are more likely to give you good reviews, which you should always ask for as standard practice. Ask on completion of the work whether they’d be willing to give you a positive review, and include it in your follow-up emails. You could even offer future discounts in exchange for reviews.

People like to get recommendations for painters and decorators, so if you’ve built trust with customers and impressed them with your quality of work, they’ll talk about you and refer you to anyone and everyone, from friends to family and colleagues. Securing repeat customers should also be a priority when it comes to your business strategy, so the happier clients are, the more likely they’ll return to you for future projects.

Grow your business when the time is right

Your marketing plan should incorporate ways to keep scaling your business, so that you can increase your earnings year on year and become an established name in your sector. Once you’re bringing in a steady stream of work and developing a good reputation, you may get more word-of-mouth referrals, but it pays to avoid complacency. As you experiment with new ways to bring in work, you’ll increase the likelihood of scalability, rather than simply aiming for consistent work.

As you start to increase the scale of your work, you can take on additional painters or decorators. Expanding your team means you’re well-resourced to take on bigger projects, which you could charge higher fees for, and reach out to a greater number of potential customers.


Get Painter and Decorator Insurance with Protectivity

Running a professional painting and decorating company needn’t be made more difficult by worrying about claims against your business. While you focus on doing great work that keeps clients happy, liability insurance gives you reassuring financial support in the event that third parties take you to court, employees become poorly or have an accident while working.

Whether someone suffers an injury, illness or damage to property, Protectivity’s Painter and Decorator Insurance gives you a range of options for protecting your reputation and finances, with your chosen limit. Our Public Liability option protects you in the event you are sued by clients or members of the public, while Employers’ Liability includes claims from staff and subcontractors.

Our insurance for tradesman is trusted by thousands. Our helpful team are on hand to support you with any queries.

Get Painters and Decorators Insurance from Protectivity


*Disclaimer – This blog has been created as general information and should not be taken as advice. Make sure you have the correct level of insurance for your requirements and always review policy documentation. Information is factually accurate at the time of publishing but may have become out of date. 

Last updated by

Bee Ingram Image

Bee Ingram

With a focus on producing high-quality, consistent content across multiple platforms, Bee is committed to creating engaging and effective messaging that aligns with the brand’s voice and strategy.

A Practical Guide to Selling Crafts Online

If you’re wondering how to sell your crafts online, it’s certainly feasible, with a low barrier to entry. You can start whenever you’re ready, with little more than a suitable home workspace and a few supplies. The sooner you start honing your skills, the better, so you can start to establish your place in the market. Of course, further down the line you can create a business plan, define your branding and find out the most effective marketing channels for your audience.

If you’re wondering how to sell arts and crafts online, read our extensive guide for everything you need to know.


Decide on a product

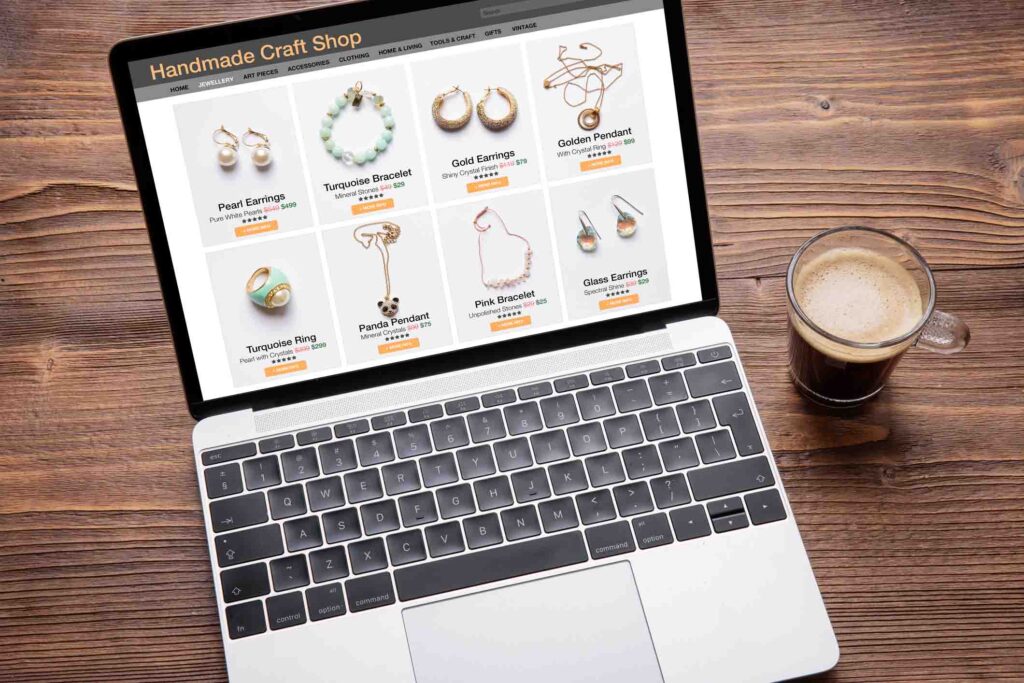
Before you even think about how to sell handmade crafts online, you have to come up with a product worth putting out there. You’ll want to create high-quality crafts, which have something unique to offer but are also in demand. You can make anything from handmade jewellery and home decor to digital prints and knitwear.

Before you start designing or constructing anything, consider your skills, interests, and target market. Do your research, read trade publications, consult Google search results, browse seller sites and research hashtags on social media. Once you’ve identified on-trend products and settled on an idea, check out what similar crafts are selling for and get to know what kind of competition is out there. See how much existing products are selling for.

After you’ve found your idea, you’ll naturally be excited to start offering it to the world. It’s important that you take your time with the creation stage when you start, however, rather than rushing something out. Make sure your products are durable and meet the expectations of your target audience.


Create your brand

In order to create a strong brand, you’ll need to understand your ideal customers, including their preferences and pain points. Tailor your brand to resonate with this specific demographic. Share the story of your craft business in emails, blogs, the about page of your website (if you have one) and social posts. Explain why you started, what inspires you, and how your crafts are made. Customers often connect more with a brand that has a compelling, emotionally-driven narrative.

Of course, you’ll need to decide what to call it. Choosing a name for your craft business is crucial as it represents your brand identity. Consider combining words that evoke creativity, craftsmanship, and uniqueness. Try alliteration, rhyming, or wordplay to make it catchy, although you don’t want to go too humorous unless it’s on-brand. If you’d rather have an aspirational brand, you can keep the name in line with a more premium feel. It will need to be easy to spell and pronounce, as well as having an available website domain. Keep it relatively short to make it easily memorable. Take your time to brainstorm and seek feedback from friends and family to make sure your chosen name resonates with your vision and target audience.

You’ll also need to design a logo, or hire a professional creative to design one, which reflects your brand style and establishes a visual identity you’re happy with. A well-crafted logo is a powerful tool to leave a lasting impression on your customers. Start by reflecting on your product’s essence and your company values. Use colours, fonts, and imagery that convey creativity, handmade quality, and uniqueness. Simplicity is key, as a clutter-free design is more memorable. Incorporate craft-related elements, such as tools, materials, or your signature product. Sketch ideas, create mood boards and seek inspiration from other craft businesses. Your logo should be versatile, working well on various online platforms and offline materials.

Create branded materials such as business cards, packaging, labels, and thank-you notes. These should carry your logo and branding elements. Choose a colour palette and fonts that align with your brand’s personality. They should be consistent across everything your brand is associated with.

Invest in good product photography. This is crucial for your craft business because it can significantly impact how your products are perceived by potential customers. Use natural light, high-resolution images, and multiple angles to showcase your crafts. The better your photos, the more likely you’ll make sales. Use a clean, uncluttered background that doesn’t distract from the product. A plain backdrop, seamless paper roll, or props that enhance the product can work well. Position the product centrally or off-centre, depending on the composition you prefer.


What is the best website to sell crafts?

The question of which platform/s you’ll make your products available on is highly important when deciding how to sell crafts online in the UK. In addition to your own website, there are a range of online marketplaces you can choose from.

Here’s an overview of online platforms for selling crafts:

Etsy: Etsy is still the biggest marketplace for handmade products, with over 88.3 million buyers last year. It also has low seller fees.

Not on the High Street: NOTHS is renowned for handmade crafts, making it a go-to destination for people searching for unique gifts. 

Amazon: There’s vast potential from this retail giant serving millions of customers, with a dedicated platform, Amazon Handmade. 

Ebay: With hundreds of millions of monthly visits, Ebay is user-friendly for listing your products and offers useful selling tools. 

Facebook Marketplace: if you want to know how to sell crafts online for free, this is a the only platform that doesn’t charge. You can sell to people within 100 miles.

Shopify: With a customisable online store featuring thousands of apps to make use of, you can sell as much as you like when you set up your own site on Shopify.


How to start selling crafts online

Once you’re ready to sell online, these are some of the key areas to bear in mind:

Pricing: Calculate your costs by working out the total of materials, labour, shipping, and platform fees (once you know where you’ll sell), then adding a reasonable profit margin. You’ll need to strike a balance between offering customers a competitive price and charging your worth. 

Copywriting: Write copy for the different touchpoints your brand will sit on, such as transaction pages, social media, emails and your own website, if you’ll have one at this stage. Decide on the tone of voice you want to use when addressing your customer. Write detailed and appealing product titles, descriptions and articles, highlighting the unique features and benefits of your crafts.

Shipping: Determine your shipping methods and rates. Your items will need to be securely packaged to prevent damage during transit. Offer tracking and delivery confirmation if possible.

Payment processing: Set up secure and convenient payment options for your customers. PayPal, credit cards, and buy-now-pay-later options like Klarna and Clearpay are popular payment methods to consider.

Customer service: Provide excellent customer service. Respond promptly to inquiries, address issues professionally, and maintain a good reputation for your business. This will keep customers coming back and encourage them to recommend you to others.

Legal and tax considerations: You’ll need to comply with local laws and regulations for online businesses, paying attention to your tax obligations. You might need to register your business, get a resale licence, or collect sales tax in certain cases. Consult with a legal or financial professional if necessary, as this could save you money and avoid costly issues.


Organising your business operations

Good organisation and clear processes, even if you’re working alone from home and aren’t creating vast amounts of product yet, will help you to run your craft business effectively. If you have these in place from the start, you’ll have the right mindset for continuing to grow and be ready for the challenge. Here are some tips to help you manage your day-to-day operations:

Organise your workspace: Keep your craft supplies and finished products in dedicated areas, making use of different containers and having a methodical filing system for orders, invoices and other paperwork. Label and categorise materials for easy access.

Set up an inventory system: Establish a tracking system to record the quantity and details of each item. You can use straightforward spreadsheets or more sophisticated inventory management software.

Monitor stock levels: Regularly check your inventory levels. Set reordering points for materials to ensure you order more before you run out. This helps prevent backorders and production delays. 

Prioritise fast-moving items: Pay special attention to crafts that sell quickly or seasonally. Keep more of these items in stock to meet customer demand. 

Batch or create in small batches: Consider making crafts in small batches, rather than producing in large quantities. This allows you to adjust your production based on sales trends and reduce the risk of overstocking.

Manage lead times: Be aware of lead times for your materials. Some materials may have longer lead times or require international shipping. Plan your orders accordingly.

Safety stock: Maintain a safety stock level for your most essential materials. This extra buffer helps prevent shortages in case of unexpected high demand or delays in supply.

Use technology: Consider using inventory management software to streamline your processes. These tools can automate reordering, track sales trends, and provide real-time inventory data.


How to make money selling crafts online

If you’re wondering whether selling crafts online is profitable, the answer is that it can be if you approach it in the right way. Of course, you need to start with a good product, but even then, there are no guarantees and you have to work hard to promote it. Rather than there being a magic formula for how to make money selling crafts online, it takes a little experimentation, an open mind and a willingness to adapt and try new ways of selling your wares.

Finding success can therefore be a gradual process, as it takes time and effort to build a strong brand and a loyal customer base. Be open to refining your strategies as you gain experience. Here are some of the most important tactics that will help you to increase your online income from selling crafts:

Marketing: Try using social media, email marketing, and paid advertising to promote your crafts. See what works best for you so that you can assess where it’s worth investing your time. Engage with your target audience, share your creative process, and build a community around your brand.

Search engine optimisation (SEO): Use relevant keywords for SEO, so that your customers can find you in Google when searching for terms related to your product.

Feedback and reviews: Encourage satisfied customers to leave reviews. Positive testimonials build trust with potential buyers, as people like to see social proof before they commit to buying.


Nurture your business for long-term growth

Growing your business is a process that requires patience, adaptability and dedication. There are no guarantees for when it will start being profitable, as this is influenced by elements like market demand, product quality, and effective marketing. Many crafters start as a side hustle and gradually expand as they gain experience and a loyal customer base.

As your craft business grows, maintain a future-focused perspective and keep these tips in mind:

Price your products appropriately: this is crucial for the success of your business and as you grow, you can think about whether to increase your prices.

Harness your data: Analyse your sales data, customer feedback, and website analytics to identify areas for improvement.

Listen to customer feedback: Continuously improve your products and services based on the input of those who matter most.

Diversify your products: Consider expanding your product line to include related items, such as lifestyle products or accessories.

Network and collaborate: Broaden your reach by building relationships with other crafters, artisans, retailers, and potential collaborators.

Commit to ongoing learning: Keep up with industry trends and developments to stay competitive.


Get Crafters Insurance with Protectivity

Protecting your wares is made much easier with specialist craft insurance. Whether you’re an online seller or heading out to craft fairs, it makes sense to be as prepared as possible for any kind of incident.

Protectivity’s Crafters Insurance is designed to give protection from customer or third-party claims, with Product Liability Insurance for the event of accidental damage to someone else. You can also opt for Craft Fair Insurance, specifically created for stallholders.

Find out more and get an instant quote tailored to the needs of your business. Get in touch if you have any queries at all.


Get Crafters Insurance from Protectivity


*Disclaimer – This blog has been created as general information and should not be taken as advice. Make sure you have the correct level of insurance for your requirements and always review policy documentation. Information is factually accurate at the time of publishing but may have become out of date. 

Last updated by

Bee Ingram Image

Bee Ingram

With a focus on producing high-quality, consistent content across multiple platforms, Bee is committed to creating engaging and effective messaging that aligns with the brand’s voice and strategy.

How to Get a 5-star Food Hygiene Rating

The UK Food Hygiene Rating System (FHRS) is a valuable tool for both consumers and food businesses, created by the Food Standards Agency (FSA). It promotes transparency, encourages food safety compliance, and helps people make informed decisions about where to eat or purchase food. Businesses have to maintain high standards to achieve and retain a 5-star rating, which is the ultimate mark of excellence in food hygiene and safety.

If you’re wondering how to get a 5-star food hygiene rating, look no further. Here are some tips and advice to help you achieve and sustain a high rating.


What does a 5-star hygiene rating mean?

A 5-star hygiene rating is the highest possible rating a catering business can achieve under the FHRS. Here’s what it means for catering businesses in the UK.

Excellent food hygiene and safety

A 5-star rating indicates that the catering business has demonstrated very good food hygiene and safety standards during a thorough inspection, conducted by local authority environmental health officers. It is a clear sign that the establishment has done as much as possible to provide safe and hygienic food to its customers, in a clean environment.

Full compliance with food safety regulations

Businesses with a 5-star rating have shown full compliance with food safety regulations and best practices. This includes maintaining high standards in food handling, preparation, storage, and serving, as well as the cleanliness and maintenance of the premises.

Strong management of food safety

Achieving a 5-star rating reflects a high level of competence and confidence in the management of food safety within the business. This includes proper record-keeping, staff training, and a commitment to maintaining rigorous food safety practices.

Reduced health risks

For customers, a 5-star rating offers reassurance that your catering business poses minimal health risks. Foodborne illnesses and other food-related health issues are less likely to occur in food outlets with such a high rating.

Increased customer trust

A 5-star rating is a powerful marketing tool, as it can build trust and confidence among potential customers. It demonstrates that your business takes food safety seriously and values people’s wellbeing.

A competitive advantage

In a highly competitive market, a 5-star rating sets your catering business apart from competitors. It can attract more customers, boost repeat business, and enhance your professional reputation.

Compliance with the law

Displaying a 5-star rating is not just a matter of prestige; it’s a legal requirement in England and Northern Ireland. Businesses are obliged to display their ratings prominently, making them clearly visible and accessible to the public.  If you’re awarded a rating in the highest end of the scale, you are doing everything possible to follow the law.

There is a slight difference for online food businesses, who still have to comply with legal regulations but aren’t obliged to display their ratings.

Continuous commitment

Maintaining a 5-star rating is an ongoing commitment, so you can’t rest on your laurels. Inspections will take place as frequently as every six months for some businesses deemed high-risk; they could be every few years for others. Businesses must therefore consistently adhere to high food hygiene and safety standards, as ratings can change with subsequent inspections.

Even if you are inspected less regularly, you will still want to do everything possible to keep customers happy and of course, avoid being reported to authorities for low hygiene standards or health incidents. Regular self-audits, staff training, and vigilant management are necessary to sustain this top rating.


Understanding the system and processes

Familiarise yourself with the food hygiene rating system, so that you know what you need to do to create a healthy business that also has the best chance of a healthy bottom line. Here’s some key information about the FHRS requirements and how the process works.

Who is rated

The FHRS scheme covers various types of food businesses, including restaurants, cafes, takeaways, pubs, food retailers, and more. It applies to businesses in England, Wales, and Northern Ireland. Scotland has a similar scheme called the Food Hygiene Information Scheme (FHIS).

The rating scale

The FHRS uses a scale from 0 to 5, with 5 being the highest rating (very good) and 0 being the lowest (urgent improvement necessary). The ratings are based on the following criteria:

Hygiene standards

Structural compliance (cleanliness, layout, lighting, and ventilation)

Confidence in management (record-keeping, training, and management of food safety)

Inspection process

Local authority environmental health officers conduct inspections of food businesses to assess their compliance with food safety regulations. These inspections are unannounced, and the frequency may vary depending on the type of business, its history, and the perceived level of risk.


Displaying ratings

Food businesses in England and Northern Ireland, with physical premises, are required by law to display their FHRS rating prominently, such as on windows or doors, and at their entry points. In Wales, it is encouraged but not mandatory.

Appeals and re-inspections

If a business disagrees with its rating, it has the right to appeal the decision. Additionally, food businesses that receive a low rating can request a re-inspection after making necessary improvements. Re-inspections allow for the possibility of a better rating.

Access to ratings

Consumers can easily access food hygiene ratings online or through mobile apps, making it convenient to check the rating of a food establishment before dining or buying food. The ratings are also available on the official Food Standards Agency (FSA) website.

Improvement notices and closures

In cases where a business is rated very poorly (0 or 1), local authorities may issue improvement notices or, in extreme cases, close the business if there is an imminent risk to public health. The business can only reopen after addressing the issues identified during the inspection.


Does it cost to get a food hygiene rating?

There is no direct cost associated with receiving a Food Hygiene Rating as part of the Food Hygiene Rating Scheme (FHRS). Local authorities carry out inspections and issue ratings to food businesses as part of their statutory responsibilities for food safety. These inspections are typically funded by local government budgets and taxpayers’ money.

It is intended to be a transparent and objective assessment of the establishment’s food safety practices, made available to the public to inform their dining choices. However, investing in food safety and hygiene practices is an essential part of running a responsible and reputable food business.

Additionally, there are some potential indirect costs that a food business may incur as part of the process of getting a good food hygiene rating:

  • Staff training – Food businesses may need to invest in staff training to ensure that employees are knowledgeable about food safety and hygiene practices. While this is not a direct cost associated with the rating itself, it is an essential part of maintaining a good rating.
  • Improvement costs – If your food business receives a low rating (e.g., 0 or 1) and you want to improve it, you may need to invest in necessary improvements to meet food safety standards. These costs can include repairs, equipment upgrades, or changes in procedures.
  • Re-inspection costs – After making improvements following a low rating, businesses can request a re-inspection to potentially improve the rating. While this is not a direct fee, there may be costs associated with implementing changes and preparing for the re-inspection.
  • Training materials – You may choose to purchase food safety training materials for your business, or hire trainers to help educate your staff.


How to get a 5-star food hygiene rating

Getting and maintaining a 5-star food hygiene rating is essential for protecting both your customers and your company’s success. Being awarded this rating is an ongoing process requiring dedication, attention to detail, and a strong commitment to food safety. It’s not about reaching an end goal and then relaxing. You’ll have to regularly review and update your practices throughout the life of your business, ensuring the safety and satisfaction of your customers.

Here are the general steps you’ll need to take.

Here are the general steps you’ll need to take.

The quality and uniqueness of your crafts play a significant role in your success. Customers will pay more for well-made, unique, and attractive items, so make your products stand out in terms of design and craftsmanship.

Training and education

When it comes to how to get a food hygiene rating you’re proud of, education is vital. It’s not just you who’ll need to be aware of the system’s requirements, but your team too. Ensure that all your staff members receive appropriate food safety training and certification. This includes knowledge of food hygiene, food handling, and the safe preparation of food. Regularly update and refresh this training to stay current with best practices.

Implement a food safety management system

Develop and maintain a robust food safety management system based on Hazard Analysis and Critical Control Points (HACCP) principles. This system, called an HACCP plan, should identify potential hazards and establish control measures to mitigate them.

Here’s an overview of the steps you’ll need to take in an HACCP plan:

  • Clearly define your offering and its intended use, with any specific characteristics that may impact food safety.
  • Address biological, chemical, and physical risks.
  • Determine critical control points (CCPs), which are points in the process where control can be applied to prevent, eliminate, or reduce a hazard to an acceptable level.
  • Set specific limits to control hazards effectively.
  • Establish monitoring procedures to ensure compliance with critical limits and define corrective actions for deviations.
  • Implement thorough verification processes, maintaining meticulous records.
  • Regularly review and update the HACCP plan, and provide comprehensive training for all employees involved.

Maintain a clean and organised kitchen

Keep your kitchen and food preparation areas clean and well-organised. Regularly clean and sanitise all surfaces, equipment, and utensils. Use colour-coded equipment to prevent cross-contamination.

Personal hygiene

Enforce strict personal hygiene practices for your staff, including proper handwashing, wearing clean uniforms, using gloves when necessary, and not working when ill. Make sure employees know the importance of reporting illnesses.

Temperature control

Monitor and maintain proper temperature controls for food storage, preparation, and cooking. Regularly check and record temperatures, and discard any food that has been stored or cooked at incorrect temperatures.

Food labelling and storage

Ensure that all food items are labelled with their use-by or best-before dates. Store food items correctly to prevent cross-contamination, and arrange items in a way that allows for proper air circulation in refrigerators and freezers.

Allergen awareness

Be diligent in identifying and managing allergens in your menu items. Make sure your team is knowledgeable about allergens and can communicate them to customers accurately.

Pest control

Establish a pest control program to prevent and address any infestations. Regularly inspect your premises for signs of pests and take immediate action to resolve any issues.

Documenting and record-keeping

Maintain comprehensive records of your food safety practices, including temperature logs, cleaning schedules, staff training, and any incidents. This documentation can demonstrate your commitment to food safety during inspections.

Regular inspections and self-audits

Conduct regular self-audits and inspections to identify and correct any potential issues before an official inspection. Address any shortcomings immediately.

Continuous improvement

You’ll need to stay updated with food safety regulations and best practices. Consistently improve your food safety procedures, adapting to changing circumstances and customer demands.

Seek professional advice

Consider consulting with food safety experts or organisations that specialise in food safety and hygiene, for professional guidance and support that will be valuable to your success.


Get catering insurance with Protectivity

Protecting your business isn’t just about how to get a hygiene certificate. Beyond the five-star ratings, you can do even more to preserve the life of your company by taking out a suitable catering insurance policy.

Protectivity’s catering insurance is a specialist product designed to give you a range of options suited to your business needs. Our Public Liability cover will protect you against claims that may be brought against you, from accidental injury or damage to clients and belongings. You can also select Employers’ Liability Insurance, which will cover you up to the amount of £10m in compensation if your employees are injured while working. In addition, our Products Liability Insurance gives you protection against claims arising from third-party products or goods.

Read more about our catering insurance and get an online quote in minutes.

Get Catering Insurance from Protectivity


*Disclaimer – This blog has been created as general information and should not be taken as advice. Make sure you have the correct level of insurance for your requirements and always review policy documentation. Information is factually accurate at the time of publishing but may have become out of date. 

Last updated by

Bee Ingram Image

Bee Ingram

With a focus on producing high-quality, consistent content across multiple platforms, Bee is committed to creating engaging and effective messaging that aligns with the brand’s voice and strategy.

How to Start a Candle Business

Creating calm, atmospheric spaces is a common priority in modern home design, so candles are far more than just sources of light. The right candle can exude comfort, ambience, and style, serving as an extension of the existing decor in any room. This is why starting a candle-making business can be rewarding both creatively and financially.

In this guide, we’ll explore how to start a UK candle business, from selecting unique business names to designing exceptional products and creating effective packaging.


Shortlist candle business names

One of the first things you’ll want to do is come up with potential names for your candle business. If you want to make a strong first impression on new customers, it goes without saying that you should call your brand something catchy, unique, and memorable.

Here are some tips for brainstorming candle business names:

Reflect your brand personality: The name needs to mirror the essence of your candles and how you want buyers to feel. Think about the style, scent and brand mission of your product, as well as your target customer.

Check for availability: See which of your candle business name ideas are available. If the one you really like is already in use by another business, you might still be able to use it if they haven’t registered a trademark. If the company hasn’t done the latter but is well-known, that could change things, as you’ll struggle to make yourself known in your own right. If they have registered it, you would be committing trademark infringement to use the same name, so consider alternatives like using a different spelling.

Domain name availability: Securing relevant domain names for your candle business is a smart move. Even if you’re not sure whether you’ll use them, it avoids somebody else registering them for their business at some point in the future. If this happens, it can impact the potential customers you’re able to attract through website traffic.

Test it out: Share your candle business name ideas with friends and family to gauge their reactions. You can gain valuable feedback this way, potentially raising issues or selling points you hadn’t previously considered.


Create your business plan

A well-thought-out business plan is a blueprint for your company. It provides a comprehensive overview for investors and helps you clarify your vision, serving as a roadmap to guide you in the various stages of growing your company. It should outline your short-term and long-term goals and help you to identify potential challenges, among other details.

Key components of your business plan need to include:

Business description: Explain the nature and purpose of your candle business.

Market research: Show analysis of your target market, competitors, and customer preferences.

Start-up and operating costs: Estimate your expenses and explain how you plan to fund your business.

Marketing strategy: Detail your plans for promoting and selling your candles.

Financial projections: Create a financial forecast, including income, expenses, and profitability.


Calculate your start-up costs

Starting a candle business, like any other venture, requires an initial investment. This can vary widely based on factors like scale, quality and the materials you use. On average, you can expect to invest anywhere from a few hundred to a few thousand pounds in supplies, equipment, and marketing efforts in the first year.

It’s essential to have a detailed understanding of your start-up costs to ensure that your business has the best chance of hitting the ground running. These expenses typically include:

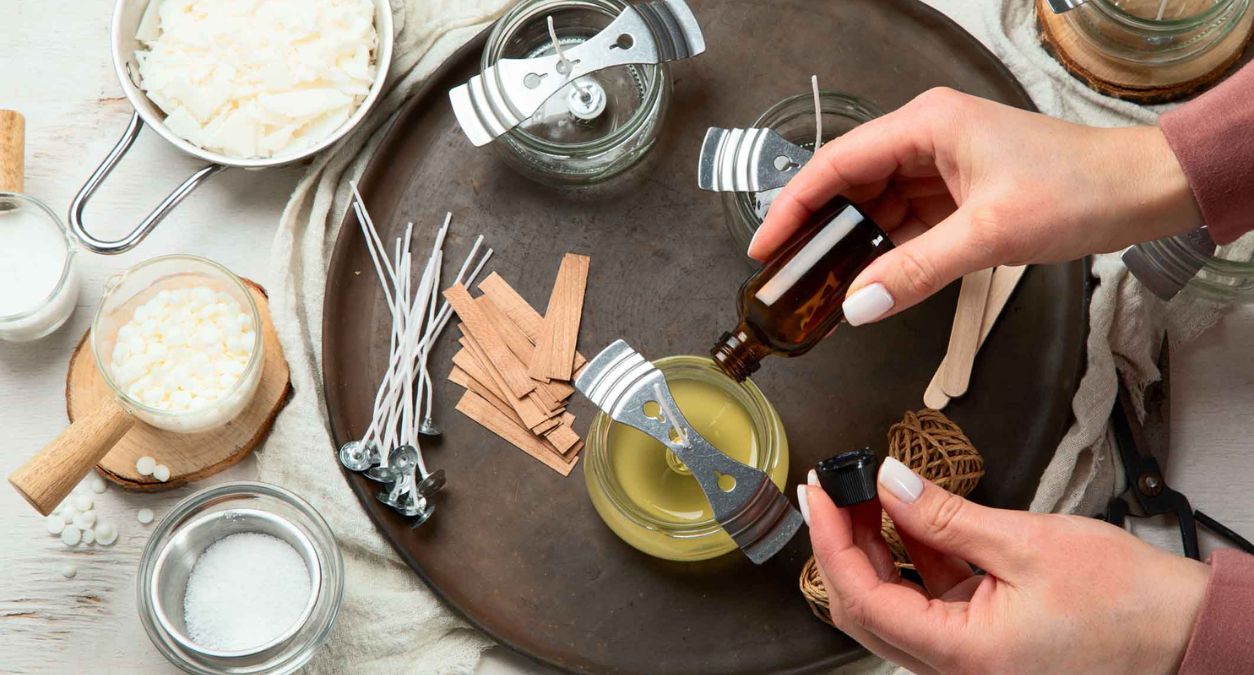
Candle-making supplies: Wax, wicks, fragrance oils, dyes, moulds, and other essential materials.

Equipment: Candle-making equipment like melting pots, thermometers, and pouring pitchers.

Packaging and labelling: Jars, containers, labels, and packaging materials.

Business registration: Costs associated with registering your business and obtaining necessary licenses.

Marketing and promotion: Budget for marketing materials, website development, and advertising.


Set up your workspace

Creating a functional, organised workspace is crucial for producing high-quality candles. Whether you’re working from home or a dedicated studio, think about the following:

Safety: Create appropriate ventilation, follow fire safety measures, and use personal protective equipment. Never leave candles unattended while burning, and keep flammable materials away from your workspace.

Organisation: Arrange your supplies, tools, and equipment in an orderly manner to enhance your efficiency as you work.

Ergonomics: Choose comfortable seating and appropriate workstations to reduce strain over extended periods of work.


Source your candle-making supplies

The success of your candles largely depends on the materials you use. It’s essential to source high-quality supplies for products that stand out in the market and burn consistently, which is important for customer satisfaction. You can find candle-making supplies in specialised online stores, local craft shops, and wholesale suppliers. Research and compare prices, quality, and shipping options to choose the best suppliers for your needs.

Wax: Options include paraffin, soy, beeswax, and palm wax. Each of these has unique properties and benefits, so do your research.

Wicks: Purchase wicks in your desired size and material, to match your brand aesthetic and identity. If you’re taking a sustainable approach, you can opt for eco-friendly varieties.

Fragrance oils and dyes: Select scents and colours that align with your brand and target audience. Again, you can choose options that fit a green business model, such as vegan-friendly oils.

Moulds and containers: You can have a lot of fun with this one to inject plenty of personality into your brand. Opt for a variety of shapes and sizes to diversify your product range.


Hone your candle-making skills

Creating exquisite candles is at the heart of your business. The more you learn and practise, the more confident you’ll become. To excel in this craft, you’ll need to:

Learn different techniques: Spend time mastering methods for various types of designs, such as container candles, pillar candles, and taper candles.

Practice consistently: Like any skill, practice makes perfect when it comes to candle-making. Experiment with different materials and techniques to refine your talents.

Follow protocols: Make sure you’re fully informed on how to avoid accidents and personal injury when working with hot wax and open flames.


Design unique candle styles

Setting your candle business apart from the competition largely comes down to the unique designs and styles you offer. They need to both echo your brand and resonate with your market.

Some design considerations include:

Colour palette: Experiment with various colours and combinations to create visually appealing candles. You can go for on-trend hues, stick to classic neutrals or use seasonal colour themes.

Fragrance selection: Offer a diverse range of scents that cater to the preferences of your customers. If it’s something you love, it’s a good sign that others will like it – but again, it’ll be valuable to get others’ opinions too.

Decorative elements: Get creative and incorporate decorative elements like dried flowers, glitter, or unique textures.

Personalisation: An easy way to expand your range and broaden your income sources is by offering the option of customised candles for gifts and special occasions.


Choose the right packaging

Packaging is not just about protecting your candles; it’s also a vital element of branding and can elevate your product. The right packaging makes a powerful first impression, enhances your customers’ unboxing experience and conveys the quality of your candles.

Consider the following packaging options:

Container type: Select containers that match your candle style and are heat resistant, whether you choose jars, tins, or other creative options.

Labelling: You’ll want your labels to provide various pieces of essential information, while visually showcasing your brand’s visual identity. Besides the name, this should include ingredients, instructions for use and your brand ethos.

Sustainability: If possible, invest in eco-friendly packaging materials to avoid a harmful global impact. This also makes great business sense, as more and more of today’s consumers place importance on reducing their carbon footprint.

Branding consistency: Your packaging needs to act as an extension of your brand image and messaging.


Know the legal consideration

Starting a candle business in the UK involves various legal and regulatory requirements, so these are essential to understand. You can consult with legal and financial professionals to ensure that you meet all the legalities for your candle business, but it’s good to be aware of what they may include:

Business structure: Do your research and decide on the legal structure of your business, whether it’s a sole proprietorship, LLC (Limited Liability Company), or corporation.

Permits and licensing: Get a business licence and look into your local authority’s requirements for candle-selling permits.

Product safety: You’ll need to be compliant with business health and safety regulations and standards, adhering to local and national laws.

Taxes: Understand your tax obligations as a business owner and keep accurate financial records.


Market your candle business

Effective marketing is key to attracting customers and growing your candle business. It’s an ongoing effort that helps you to connect with people, engage in an ongoing conversation and get them excited about your offering.

Consider these strategies:

Create a website: Build your online presence with a professional site that showcases your candles and brand. There are plenty of website-building platforms with easy-to-use interfaces, that allow even beginners to create something impressive.

Grow your social media following: Leverage platforms like Instagram, TikTok and Pinterest to share visually appealing candle photos, storytelling videos and other behind-the-scenes content.

Utilise content marketing: Write blogs, guides, and articles about candle care, home decor, and fragrances to suit every mood, to engage and educate your audience.

Use email marketing: Build a mailing list to inform customers about new products, promotions and content, collect feedback and run competitions. Emails are a good way of getting noticed by sitting in people’s inboxes, rather than having your message lost in online noise.


Try out different selling methods

The digital age has made it easier than ever to sell candles online. While it opens up a potentially global market for your products, it also requires a dedicated effort and careful attention to detail.

Here are some important points to think about in your planning:

E-commerce platforms: Choose an e-commerce platform like Shopify, WooCommerce, or Etsy to set up your online store.

Professional photography: High-quality product photos are essential for showcasing your candles.

SEO optimisation: Optimise your product listings by including keywords, to increase visibility in search engines.

Secure payment and shipping: Focus on smooth payment processing and reliable shipping methods.


Get Crafters Business Insurance with Protectivity

Growing any business takes a lot of focus and a positive mindset. This is why it’s crucial to safeguard your business with the right insurance, so that you can minimise any additional stress and give your full attention to making a success of your brand.

Protectivity’s Crafters Business Insurance is designed to protect you against the unexpected. It can cover you in cases of accidents, liability claims, or damage to your equipment and products. By securing your candle business with crafters insurance, you can do what you do best, creating beautiful candles, with peace of mind.

Find out more about our Crafters Business Insurance and get an instant quote to suit your needs.

Get Crafters Business Insurance with Protectivity


*Disclaimer – This blog has been created as general information and should not be taken as advice. Make sure you have the correct level of insurance for your requirements and always review policy documentation. Information is factually accurate at the time of publishing but may have become out of date. 

Last updated by

Bee Ingram Image

Bee Ingram

With a focus on producing high-quality, consistent content across multiple platforms, Bee is committed to creating engaging and effective messaging that aligns with the brand’s voice and strategy.

Successful Hairdressing Entrepreneurs

Whether you’ve been hairdressing professionally for some time, or are just starting out with hair styling as a career, the leaders in the field are your natural role models. They started out at the bottom, just as everyone does, and they’ve all got their own fascinating stories to tell.

This blog showcases some of the most famous hairdressers and successful hair styling entrepreneurs the world has ever seen. We’ve picked out a selection of legends and pioneers past and present, from both sides of the Atlantic, giving you inspiration and insight on what’s needed to stand out and reach the very top of your profession.


Martha Matilda Harper

The reclining shampoo chair is one of the key pieces of salon furniture that you use every day and probably don’t give much thought to. But it was invented by Martha Matilda Harper, one of the very first female entrepreneurs in the hairdressing industry. Born in Canada, she worked as a servant from an early age but gained a recipe for a hair tonic from one of her employers after he died.

In 1888, she used her life savings to open her own hair parlour in New York state, with the tonic at its core, but focusing on customer services and an enjoyable experience for all. So successful was her salon that more than 500 others bearing her name opened on a franchise basis, forming one of the world’s first modern salon chains.


Madam C. J. Walker

Madam C. J. Walker is widely regarded as the first self-made female millionaire in America. This fact is even more astounding given that she did so as an African-American in an era when the U.S. was still divided on racial lines in many walks of life.

Madam Walker built her success on the recognition that the characteristics of black people’s hair can differ significantly from other races, and many hair products on the market at the time could be harmful to African-Americans. She created different product formulations that were kinder to those characteristics, and went on to establish her own salon, factory and beauty school. Through the ‘Walker System’, nearly 20,000 women learned how to condition the scalp, promote better hair growth, and become hairdressing businesswomen in their own right.


Vidal Sassoon

If you’ve seen a photo of a famous actress from the 1950s and 60s, there’s a fair chance that you’ll be looking at a hairstyle devised by Vidal Sassoon. Having grown up in poverty in Shepherd’s Bush in London, he started as an apprentice hairdresser on the recommendation of his mother, and quickly developed a reputation for innovation.

The short, angular haircuts he provided from his London salon, which opened in 1954, became famous around the world, and he eventually moved to Los Angeles to become a stylist to the stars. Sassoon died in 2012 at the age of 84, but his legacy lives on through an extensive range of haircare products and accessories.


Charles Worthington

One of the most sought-after places at which to get a hairdressing appointment in London is at Charles Worthington’s luxurious facility in Covent Garden – and it’s easy to understand why. Along with his team of stylists, he’s been delivering eye-catching hair for models, musicians, film stars and TV personalities alike since the late 1980s. Jodie Kidd, Kim Cattrall and Diana Ross are just three of a long line of celebrities who have turned to Worthington for their styling, and his creativity has helped earn him an MBE. His team are also regularly used as the stylists in residence for the annual BAFTA awards.


John Frieda

Next time you work with a client who has particularly curly or frizzy hair, have a look at the label on the bottle of the product you use. More than likely, you’ll be using the Frizz-Ease that John Frieda invented, or one created off the back of it. He started out working at his father’s salon in London, and he quickly started moving in celebrity circles, being married to the singer Lulu for 14 years. He moved to New York in the late 1980s, and it was there that Frizz-Ease, developed in collaboration with Gail Federici, really took off. More than three decades later, his products are used all over the world, and he’s still working with A-listers today.


Jen Atkin

If you were to draw up a list of the most influential and popular hair stylists today, then there’s no doubt that Jen Atkin will be right up towards the top of it. Raised in a Mormon community in Utah, she moved to Los Angeles when she was 19 to follow her dreams for a hair and fashion career. Much of her success has been built by her pioneering use of Instagram (where she has 5.3 million followers at the time of writing) to showcase her creations and designs. This has helped her connect with leading stars and models such as Chrissy Teigen and the Kardashians, and become a major source of hair inspiration all over the world.


Nicky Clarke

Nicky Clarke is one of the most famous British hair stylists of modern times, and much like Vidal Sassoon before him, his is a real rags-to-riches story. Raised in a London council flat, he started his hair styling career when he was just 16 and built a strong reputation throughout the 1970s and 80s, including a salon partnership with John Frieda. He overcame a heroin addiction to eventually set up his own styling enterprise, which led to him becoming a TV celebrity himself and a regular fixture on various shows. His salon was badly hit by COVID-related restrictions and had to close in 2022, but his four decades of service to the industry have stood the test of time.


Ted Gibson

Many of today’s top stylists have come to prominence through appearances on TV reality shows, and Los Angeles-based Ted Gibson is a perfect example of that. If you watch What Not To Wear, then it’s his designs that you’ll be looking at!

His father was an army sergeant, which meant Texas-born Ted grew up on army bases all over the world, and he started out by going to barber school and then studying cosmetology. Working in New York as a stylist, he quickly gained a reputation for great work, as well as for discretion with the celebrity clients that he works with. Angelina Jolie and Anne Hathaway are just two of Ted’s satisfied customers, so it’s no wonder that he charges up to $2000 for a treatment today.


Antoine de Paris

If you’ve ever wondered who the world’s very first celebrity stylist was, then the answer is to be found in one of the most stylish cities on the planet: Paris.

Antoine de Paris was actually the name of his salon in the French capital: he was born in Poland under the name Antoni Cierplikowski. Many of his styles in the early years of the 20th century proved to be trend-setters in the city, and he became trusted by some of the most famous women of the time: Coco Chanel, Greta Garbo, Brigitte Bardot, Eleanor Roosevelt, and many more.

After the First World War, his bob cuts blazed a trail among wealthier young women of the time, and he opened a fashionable salon at Saks Fifth Avenue in New York in 1924. And one of his crowning glories (no pun intended!) came in 1937, when he supervised 400 coiffures in a single night ahead of the coronation of King George VI.


Get your hairdressing insurance from Protectivity

Every famous hairdresser listed here – and a whole lot more all over the world – have had to work hard to get to where they are today. As well as enjoying a lot of success, many will likely have had to overcome setbacks that you won’t necessarily read about in the media. Bouncing back from disappointment or times of difficulty is one of the most important parts of becoming successful in any line of business, and having good insurance cover in place is a major part of that.

At Protectivity, we provide wide-ranging hairdressing insurance cover for ambitious stylists just like you. If you accidentally injure someone during a styling or treatment; damage their property, or are sued for negligence, we can make sure you aren’t out of pocket. If you run a salon where you employ other people, we can also provide you with employer’s insurance, which is an important legal requirement.

Our hairdressing insurance starts at just a few pounds a month, making it a sound and affordable investment into your future career. Take a closer look at our policies today to find out more.


Get xxx Insurance from Protectivity


*Disclaimer – This blog has been created as general information and should not be taken as advice. Make sure you have the correct level of insurance for your requirements and always review policy documentation. Information is factually accurate at the time of publishing but may have become out of date. 

Last updated by

Bee Ingram Image

Bee Ingram

With a focus on producing high-quality, consistent content across multiple platforms, Bee is committed to creating engaging and effective messaging that aligns with the brand’s voice and strategy.

How Much Does It Cost to Start a Craft Business?

Starting a craft business is an exciting venture, allowing you to turn your creative passion into a source of income. Whether you’re skilled in knitting, jewellery making, woodworking, or any other craft, making a business of your hobby can be rewarding.

However, to ensure the success of your business, it’s crucial to understand the start-up costs for a craft business and the legal requirements. In this comprehensive guide, we’ll explore the expenses involved, answer questions about licensing and business registration, and provide tips on how to get started.


What are the essential costs for a craft business?

Craft business start-up costs can vary based on the scale and nature of your company. However, here’s a general breakdown of key costs to be aware of.

Materials and supplies

The cost of materials and supplies is a significant expense for any craft business. The amount you spend will depend on the type of crafts you create. For example, if you’re into woodworking, you’ll need tools, lumber, and finishing materials. If you make jewellery, you’ll require beads, wires, and other components. It’s essential to budget for these materials, and it’s a good idea to buy in bulk to potentially reduce costs.

Equipment and tools

Crafting often requires specialised tools and equipment. This could include sewing machines, kilns, engraving machines, or 3D printers, among others. The cost of these tools can vary widely, so it’s important to research and invest in quality equipment that suits your craft.

Workspace

You may need to set up a dedicated workspace for your craft business. This could be a home studio or a rental workshop, depending on the scale of your operations. Factor in rent, furniture, utilities, and any renovations or improvements, to create an efficient working environment.

Marketing and promotion

To get your craft business off the ground, you’ll need to invest in marketing your brand. This could include creating a professional website, business cards, email marketing, offline promotional materials like brochures and posters, and attendance at craft fairs or markets. Social media promotion is also essential for reaching a broader audience, with options to put advertising spend behind your posts.

Business registration

There may be registration fees involved with starting your business. Additionally, licensing can carry costs, such as street trading or market stall licences. Read more about business registration later in the article.

Insurance

Craft businesses should consider business insurance, which may include public liability insurance, product liability insurance, and contents insurance for your workspace. These insurance policies are crucial for protecting your business in case of accidents, damage, or legal issues.

Packaging and shipping

If you plan to sell your crafts online or through mail orders, budget for packaging materials, shipping costs, and postage. Shipping can be a significant cost, so explore cost-effective options and consider passing on some of these costs to customers.

Photography and branding

High-quality product photography is crucial for showcasing your crafts online and in any printed materials. You may need to invest in a good camera and potentially hire a professional photographer. Developing a distinct brand identity also involves design and branding costs, which you could enlist a professional creative to help with.

Accounting and tax

Consider the cost of hiring an accountant or purchasing accounting software to manage your business finances. This is essential for keeping track of expenses and income and fulfilling tax obligations.

Storage and inventory

If you have a significant inventory of crafts, you’ll need storage space. Renting storage facilities or managing storage costs at home is an expense to factor in.

Travel and transport

If you plan to attend craft fairs, markets, or trade shows, you’ll incur travel and transport costs. This could include fuel, accommodation, and booth rental fees.

Contingency fund

It’s always wise to set aside a contingency fund for unexpected expenses or fluctuations in business income. This acts as a safety net to ensure your craft business can weather unforeseen challenges.


Do I need a licence to sell crafts in the UK?

One of the first questions that often arise when starting a craft business is whether you need a licence to sell your crafts. There isn’t a specific craft-selling licence in the UK, but you might require other licences, depending on your business and area.

Street trading licence

If you plan to sell your crafts on the streets or in public spaces, you may need a Street Trading Licence from your local council. The requirements and costs can vary between councils, so it’s essential to check with your local authority for details.

Market stall licence

If you intend to sell your crafts at markets, you might need a Market Stall Licence, which is usually issued by the event organisers or local authorities. This licence might come with a fee, which you can inquire about when applying to participate in a market.

Food and trading standards

If your crafts are considered food, or if you’re selling items that fall under specific trading standards, you might need to meet certain regulatory requirements and obtain relevant licences or permits. This is particularly relevant for crafts like handmade candles, cosmetics, or edible items.

Alcohol licensing

If your craft business involves selling products with alcohol content, such as hom

It’s important to note that if you’re operating from your home or an online platform, you may not need any specific licence related to crafts. However, you must ensure your crafts comply with safety standards and consumer protection regulations.


Do I need to register to sell crafts in the UK?

Whether or not you need to register your craft business with HMRC (Her Majesty’s Revenue and Customs) depends on the scale and nature of your business.

It’s essential to consult with an accountant or a business advisor to determine the most suitable structure and tax implications for your business. Proper registration and tax compliance are crucial to avoid legal issues and financial penalties.

Sole trader registration

If you plan to run your craft business as a sole trader, which is the simplest and most common structure for small businesses, you’ll need to register as self-employed with HMRC. This registration is necessary if your craft business is your primary source of income. You’ll need to keep records of your income and expenses, and you may need to pay income tax and National Insurance.

Limited company registration

If you intend to operate your craft business as a limited liability company (LLC), you must register it with Companies House and inform HMRC. This structure offers more legal protection for your personal assets but comes with additional reporting and tax obligations.

VAT registration

If your craft business generates a significant income, you might also need to register for Value Added Tax (VAT) if your annual turnover exceeds the VAT threshold. This is subject to change but is typically over £85,000. VAT registration involves charging VAT on your products and submitting periodic VAT returns.


Can you make money from selling crafts in the UK?

Firstly, there is plenty of potential to make money from selling crafts. However, there are various factors to consider, such as the quality of your offering, your marketing efforts, and your business strategy. Find out in more detail how you’ll be able to earn more and cover your craft business start-up costs.

Craft quality

The quality and uniqueness of your crafts play a significant role in your success. Customers will pay more for well-made, unique, and attractive items, so make your products stand out in terms of design and craftsmanship.

Market research

Conduct thorough market research to identify your target audience and competitors. Understand what sells well in the craft market and how you can differentiate your products.

Pricing strategy

Determine a competitive pricing strategy. Ensure that your prices cover your costs and provide a reasonable profit margin. Don’t undervalue your work, but be mindful of pricing yourself out of the market.

Sales channels

Consider where and how you want to sell your crafts. Options include craft fairs, markets, online marketplaces, your own website, and social media. Diversifying your sales channels can help reach a broader audience.

Marketing and branding

Invest time and effort in marketing and branding. Effective promotion on social media, craft forums, and local events can help you build a customer base. Creating a distinct brand identity will set you apart from competitors.

Financial planning

Develop a comprehensive business plan that includes a budget and financial projections. This will help you keep track of your expenses, income, and overall profitability.

Customer service

Providing excellent customer service and responding to customer feedback can help you build a loyal customer base and positive reviews, which can be crucial for your business’s success.

Legal considerations

Ensure that you are in compliance with all legal requirements, such as safety standards, licensing, and tax obligations. Non-compliance can lead to costly penalties and damage your business reputation.

Persistence

Building a successful craft business takes time. Be patient and willing to adapt your strategies as needed. Don’t be discouraged by initial challenges.

Networking

Connect with other crafters, attend craft-related events, and consider joining craft associations or online communities. Networking can provide valuable insights and support.

While it’s possible to make money from selling crafts in the UK, it’s important to have realistic expectations and be prepared for the challenges that come with running a business. Success often requires dedication, innovation, and the ability to adapt to changing market conditions.


How do I start a small craft business in the UK?

Starting a small craft business in the UK involves several important steps. Here’s an overview of how to get started:

Clarify your business idea: Identify your craft niche and products. Conduct market research to understand your target audience and competition.

Create a business plan: Create a detailed business plan, containing your goals, target market, marketing strategy, financial projections, budget and investment needs.

Register your business: Decide on the legal structure of your business (sole trader, limited company, etc.). Register it with the appropriate authorities.

Come up with a business name and branding: Choose a business name and check it’s not already in use. Develop a brand identity, including a logo and visual elements that represent your crafts.

Develop your product: Create or source the crafts you plan to sell. Ensure that your products meet safety standards and regulations.

Set your pricing: Determine your pricing strategy to cover costs and make a profit.


Get Crafters Insurance with Protectivity

There are things you can do to minimise the start-up costs for any craft business. This includes having the right craft insurance to cover you in the event that incidents may occur. This way, you can lessen the potential financial impact that could threaten your operation.

Protectivity’s Craft Insurance offers Public Liability cover, designed for accidental damage to customers or third parties, and Employers’ Liability, for any staff you may employ. Our Products Liability extension has been created for claims around third-party products, or opt for Equipment and Stock Cover for loss, damage or theft. We also offer Craft Fair Insurance, if you need cover for your equipment and supplies at one-off or short-term events.

Read more and get a personalised quote today. If you need help with anything, our friendly team can answer any queries you may have.

Get Crafters Insurance from Protectivity


*Disclaimer – This blog has been created as general information and should not be taken as advice. Make sure you have the correct level of insurance for your requirements and always review policy documentation. Information is factually accurate at the time of publishing but may have become out of date. 

Last updated by

Bee Ingram Image

Bee Ingram

With a focus on producing high-quality, consistent content across multiple platforms, Bee is committed to creating engaging and effective messaging that aligns with the brand’s voice and strategy.

How to Start a Food Truck Business

All over the country, countless people just like you are branching out with their own food truck business. From traditional fare like burgers and hot dogs, to the tantalising tastes of Asia and Africa, there’s a booming market for delicious meals and snacks on the go. By setting up your own food truck business, you could work at events or set up in a public place to attract customers – but there’s plenty of planning to do to get yourself up and running.

This guide tells you everything you need to know about starting a food truck business, from equipment and stock to licences and payment, and everything in between.


Why should you start a food truck business?

If you’re stuck in a rut with the nine-to-five, and fancy a change of pace towards a job you enjoy, then looking at setting up a food truck might just be the thing for you.

Starting your own food truck business gives you an opportunity to get creative, and to share some of your great recipes with the public. And not only that, you can be your own boss, work where and when you want (within reason!) and work towards making your food truck business exactly how you want it to be.

Couple buying from food van


Things to do to set up a food truck business

Getting a food truck business up and running isn’t as simple as rolling up in your vehicle and getting cooking: there’s plenty of planning and preparation required before you can start selling your dishes to the public.

This list covers all the key basics that you’ll need to navigate as you get started. It isn’t an exhaustive list and you don’t necessarily have to approach them all in this order, but all of them need to be considered along the way:

Create your concept

First of all, you should work out exactly what you want to offer and how you present it. A theme and brand for your food truck business is vital if you want to stand out from the crowd. While working this out, you should not only assess the dishes that you’re capable of creating to a high standard, but also the other food trucks that are already operating in your area. If you offer a style of food that’s already well-catered for, you may find it difficult to get enough market share.

Research your marketplace

Once you’ve got a solid concept in place, you can begin to explore the potential locations and customers that you can target. These could be certain positions and parking spots that will give you access to the public; special events like festivals, sporting events or street food fairs where you can get a pitch in exchange for a fee; or private-hire bookings for occasions like weddings or office parties. The mobility of your business means it’s entirely possible to combine all of these at different times.

Develop your menu

Working out the exact details of your menus is an important early step. You’ll not only want to think about dishes that are delicious, but also make sure that you can charge a realistic amount for them and make a decent profit. Also bear in mind that it’s now become customary for food vendors to provide vegetarian and/or vegan options, so it’s worth creating some meat-free ideas if you don’t already have any.

Work out your prep, storage and freshness times

Connected to your menu preparation, you’ll also need to consider the preparation of your food, including what you can do in advance and what you’ll need to do on site after taking an order. This should consider storage, especially if things need to be kept chilled or frozen, and how long items can safely be stored for before they have to be thrown away. These decisions will play a major part in helping you work out the stock you need to buy, and when you need to buy it.

Remember ingredients and allergies

Don’t forget that you’ll need to provide full information about all the ingredients that you use if requested to do so. The legislation around food and potential allergies has been tightened significantly in recent years. As a result, you should make sure you read up on your requirements, and inform customers over any products that might cause an allergic reaction in certain people.

Register your business

With most of your food-related needs sorted out, you can then start to look at more of the business and finance-related details. You should begin by registering your business, once you’ve decided the form it will take. The simplest way to start will be as a sole trader, but you should remember that you’ll be personally liable for any debts you run up. Limited companies come with a bit more complexity, but do give you some extra protection. Read more about small business accounting in our guide here.

Get your funding in place

You may need to get some extra funds in place to get your business up to speed. This may well be the case if you need to source and fit out a vehicle (which will probably be your biggest initial outlay), or you may need support getting equipment, cooking appliances and your initial stock. There are plenty of small business loans and credit facilities available for you to take advantage of, but make sure you don’t sign up to repayment terms that put you under too much pressure.

Ensure you have the right driving licence

Depending on the size of the vehicle you have in mind, you may need an extra class on your driving licence to be legally able to drive it. Start by checking the classes you already have (these are the letters on the back of your photocard), and compare them with your target vehicle. Then look at the costs of any training and testing you may need to make the grade.

Invest in a reliable vehicle

While it’s easy to get swept up in the excitement of getting the perfect vehicle for cooking and food preparation, don’t overlook the importance of its mechanical reliability. Without being able to reliably get to your planned selling locations, your sales and revenue are stopped dead in their tracks. Remember that any deal that looks too good to be true almost certainly is – and if you don’t have automotive expertise, ask a friend for their advice.

Complete your fit-out

Once you’ve got your vehicle, then you can start fitting it out with all the workspace, storage areas and appliances you need. With only a limited amount of space to work with, measurement is the key here. Come up with as precise a plan as you can as to what will go where, and measure any equipment and appliances you need precisely, ideally before buying them. If you buy things that get in the way, don’t fit or that you can’t get into the vehicle, you could be left with a problem that’s very expensive to rectify.

Get the right operating licences

In order to sell your creations, you will need some licences, depending on the nature of your sales. For example, if you’re planning on trading in a public space, then you will need permission from your local council or authority. If you’re going to serve anything alcoholic, then you’ll need an alcohol licence, which you can get for yourself personally rather than for your company. There may be others applicable to you, so seek advice from the authorities about which ones may apply to you.

Forecast your running costs

For any small business, keeping control of cashflow is absolutely paramount. You may find that your income goes through peaks and troughs – you’ll be more likely to make big money at the weekends, and during the warmer months of the year. But you’ll still have overheads to shell out on, from tax, insurance and fuel for your vehicle, to stock, energy and marketing. You should try and predict your expenditure as closely as you can and as far ahead as you can, so that you don’t find yourself short of cash at any point. Planning major purchases well in advance can also help you smooth out your cashflow.

Consider how you’ll serve customers and take payment

Remember the old saying: ‘the first taste is with the eyes’. In your case, that means the presentation of your vehicle and the overall customer experience, especially if you’re in an environment where there are many other competing food trucks around. It’s critical that your food truck looks inviting, has the menu and prices clearly displayed, and has an uncluttered counter so that it’s easy to get served. It’s also important to consider how you’re going to take payment: many food truck operators have shunned the inconvenience of cash and now use mobile card readers as payment devices instead.

Take health, safety and hygiene seriously

There are a number of different risks that come with food trucks, for yourself, your customers, and anyone you employ to work for you. For customers, there is the risk of them becoming ill or (as mentioned above) suffering an allergic reaction, while the confined nature of your working space can heighten the risk of an accident for anyone inside the truck. Make sure you conduct a full risk assessment, and adopt a diligent and proactive approach to food hygiene – getting a top hygiene rating from your local authority can be a big selling point to your customers.

Put good insurance cover in place

Insurance is vital for any business, but for small businesses in particular. A claim against you by a customer who has got ill, or an employee who has got hurt inside your truck, could cost thousands to defend. This can have serious and long-lasting ramifications for your personal finances, especially if you’re operating as a sole trader. Furthermore, most events that host food trucks will require you to have public liability insurance as a condition of attending. For both of these reasons, you should always make sure you have comprehensive insurance cover in place.

Implement your marketing and advertising

By this point in the list, you’re more or less ready to go, and it’s time to start getting your brand, menu and creativity out to a wider audience. Social media is definitely the best place to start, as you can spread your message to large numbers of people for free. You may, however, want to consider paying for some ads on social platforms as a way of getting noticed. But social media isn’t the be-all and end-all: don’t neglect the power of more traditional forms of advertising, like leaflets, posters, newspaper adverts, and an eye-catching blackboard outside your truck when you’re open.


Get catering business insurance with Protectivity

Taking all of the steps listed above can give your food truck business the best possible chance of success. However, no business is 100% immune from unforeseen circumstances, and as a small business operator, the financial implications of an unfortunate event can be severe.

That’s why it’s so important to have good insurance in place, such as the catering business insurance that you can get from Protectivity. Our comprehensive cover includes up to £5 million of public liability insurance, up to £10 million of employers’ liability cover if you employ other people, products liability for everything you sell, and the option of commercial legal protection.

Our cover starts from just a few pounds a month, but can give you the confidence and peace of mind to grow your food truck business into something really special. Take a closer look at our catering business insurance today.

Get Catering Insurance from Protectivity


*Disclaimer – This blog has been created as general information and should not be taken as advice. Make sure you have the correct level of insurance for your requirements and always review policy documentation. Information is factually accurate at the time of publishing but may have become out of date. 

Last updated by

Bee Ingram Image

Bee Ingram

With a focus on producing high-quality, consistent content across multiple platforms, Bee is committed to creating engaging and effective messaging that aligns with the brand’s voice and strategy.

The History of Barbershops

You may not be surprised to know that barbering has evolved quite a lot over the years. However, it dates back much further than you may realise.

The history of barbershops reflects the shifting attitudes toward grooming, fashion, and masculinity throughout the ages. While the craft itself has changed quite dramatically in many ways, the role of the barbershop as a place for camaraderie and social connection remains an enduring aspect of its cultural significance.

In this guide to barbering’s fascinating past, we explore the industry’s origins, the services previously offered, and how the profession has transformed over time.


A brief history of barbering

The first razor blades are thought to originate from the Bronze Age, so barbering can be traced back to early tribes and ancient civilisations. In ancient Egypt, just like today, barbers’ core duties were cutting hair and grooming, including beard trimming and head shaving. However, barbers also led religious ceremonies in priest-like roles, due to the belief that evil spirits could enter a person through their hair. People thought that barbers had special powers and could interact with the divine, so they would play a central part in weddings and even baptise people.

In ancient Greece, barbering was considered a highly respected occupation. Barbershops were social centres where men got together to engage in conversation, often themed around politics and philosophy. The Romans then adopted the practice of barbering from the Greeks, establishing public barbershops where men could receive haircuts and shaves.

During the Middle Ages, barbers actually functioned much like today’s surgeons and dentists. In fact, they were widely known as barber-surgeons. They performed surgical procedures alongside their grooming services like bloodletting, setting broken bones, tooth extraction, trepanation (drilling holes into skulls) and – just when you thought it couldn’t get any worse – amputations. Maggots would be employed to purify infected wounds. Removing blood from patients for medical reasons was a common practice at the time, for conditions such as epilepsy, plague, smallpox and gout. Incredibly, no formal training was given for any of this, as the first barber schools didn’t open until the late 1700s.

In the Renaissance period, barbering gained more prominence as grooming and personal hygiene became increasingly important to people’s reputations. This surge was also due to the increase in urban centres, where affluent men would network around public spaces containing civil buildings. These areas were held in high regard as places to get together to discuss art and culture.

In the 17th and 18th centuries, barbershops continued to offer medical services, while also serving as social places where people could meet for lively interaction, discussions, and news sharing (otherwise known as gossiping). Men could buy cosmetic products to take home and continue their self-care routine in between appointments.

The mid-18th century saw the division of the barbering and medical professions, as medicine became more specialised. A bill was passed in 1745 to separate these lines of work; the surgeons who instated this went on to found the Royal College of Surgeons of England.  However, barbers weren’t actually banned from performing surgery; they just ceased to be the primary providers of these procedures. It took a good while until grisly scenes around the barber’s chair were finally phased out. The surgical element of a barber’s duties didn’t die out until around the mid-1800s. After this, barbershops became places offering more relaxation and enjoyment, with these important social spaces for men becoming pleasant community gathering spots once again.

In the 1900s, electric clippers and other modern grooming tools were introduced, making haircuts and shaves more efficient. Barbershops became more simplified in terms of the services they offered, focusing on haircuts, shaves, and grooming. Towards the latter part of the century, unisex salons were established, which led to the rise of hairdressing chains. As a result of people preferring these types of businesses for their haircare needs, there was a decline in traditional barbershops. However, there was a resurgence of interest in traditional barbershops towards the end of the 1900s and the beginning of the Noughties. This was driven by nostalgia and a desire for more personal grooming experiences.

Today, modern barbershops offer a blend of traditional grooming services with contemporary styling and products. Barbershops have once again become social hubs, often offering beverages, music, and a returning sense of community as people hang out and chat.


The origin of the barber pole

The barber pole is a widely-recognised marker of the profession, still seen outside many establishments today. Barber-surgeons began using a red and white pole as a symbol of their dual duties, after being prohibited from placing blood in their windows. The red colour represented the blood, while the white represented the bandages. In medieval Europe, when barber-surgeons formed guilds to regulate their profession, the barber pole was placed outside their premises to signify the services they offered.

The barber pole was often a wooden or metal pole with a top that could rotate, just like the swirling varieties still around today. This turning feature had practical significance, serving as a visual advertisement for attracting customers. It signalled that the barber-surgeon was open for business. Over time, some variations were added, such as the colour blue to represent veins and a brass basin at the top, depicting the containers used for bloodletting.

Despite the separation of the barber and surgeon professions as the latter sought more extensive medical training, the barber pole’s symbolism endured. It remains a signifier of barbering’s historical ties to the medical field.


What services did barbers used to offer?

There have been pretty vast changes over the years in what customers could typically expect their barber to provide. While surgeries have been the most shocking on the list, barbershops have offered a wide range of other services beyond haircuts, shaving and grooming.

Wig making and maintenance

In past centuries, when wigs were fashionable, barbers were skilled in creating, fitting, and maintaining wigs for their clients. This included cutting and styling wigs to match the latest trends.

Ear piercing

In some cultures and time periods, barbers offered ear-piercing services, particularly for young boys.

Cupping therapy

Barbers traditionally used cupping in place of bloodletting if clients were too weak, young or old for the preferred practice. Seen as inferior to bloodletting, the process involved burning air out of a glass and applying it to the skin to remove dead blood cells. This practice declined with advances in medicine. However, hijamah cupping therapy has made a comeback today, to stimulate the flow of energy in the body, promote wellbeing and relieve pains.

Hair singeing

Originating in Turkish barbers centuries ago, this particular technique singed off split ends with a lit taper or wand. It had another function though, as hair was believed to be hollow at the time, so singeing was performed to seal the ends and prevent diseases from entering the head. There has actually been a resurgence in hair singeing in recent years, though strictly for grooming purposes.

The range of services offered by barbers has evolved over time, with today’s barbers primarily focusing on cutting, styling, beard grooming, and related services. However, some traditional barbershops still offer a few of the classic services, such as straight razor shaves, shoulder massages, nail trimming and facials, to maintain a connection to their roots as well as cater to today’s discerning customers.


The evolution of barber tools

As technology and customer needs have advanced, the contents of a barber’s kit have steadily changed. Ancient barbers would have used primitive tools like flint knives, bronze razors, and seashells, while the barber-surgeons that came a little later commonly made use of instruments that would look highly unsettling in the same environment today. They included scalpels, knives, probes, saws, cauteries (red-hot irons), clamps and hooks. Even more intimidatingly, they were often rusty and dirty, little being known about the benefits of hygiene at that time. This also meant surgery was typically performed in standard clothing, without changing afterwards, and used paraphernalia was left lying around the barbershop.

Straight razors, also known as cut-throat razors, became the tool of choice for barbers during the Renaissance and Enlightenment periods. These single, ultra-sharp blades were typical until the 19th century saw new innovations in razor design, with the introduction of the safety razor. This featured the protective guard we’re accustomed to today, reducing the risk of nicks and cuts. Around the same period, shaving brushes made from animal hair were brought to market, allowing barbers to create a lather with shaving soap and improving the quality of shaves.

There were quieter years for barbers, amounting to the best part of a century. During these decades, it looked like the trade may die out completely. It was largely down to personal grooming brand Gilette, which released the world’s first system razor (a two-piece safety razor) in 1903. This allowed the public to take personal grooming into their own hands like never before, without worrying about the risk of injury. During World War One, when soldiers had to have their own shaving kit to maintain their facial hair, personal razors took off like never before.

In 1921, Leo Wahl introduced the first electric hair clipper, revolutionising the haircutting process once again. They offered greater speed and consistency in hair cutting, allowing them to quickly gain popularity in barbershops and become a staple tool. In the 1970s, plastic disposable razors were invented by Bic, with a single blade.

An updated design, offering replaceable blades, was invented by Gilette in 1975. This was the first cartridge razor, also with a plastic handle, and a return to two blades. As they became widely available, these highly convenient razors eliminated the need for regular blade sharpening or having to throw away the whole razor. The plastic razor is, of course, still around today, with endless innovations continuing to provide a safer and more comfortable shaving experience at home. However, barbers now have much more sophisticated tools at their disposal too, allowing them to continue offering a premium experience.

Barber tools evolved in the late 20th century with the introduction of cordless, rechargeable clippers and trimmers, making grooming even more convenient. High-quality stainless steel straight razors are still used in traditional barbershops, though. Alongside these, advanced grooming tools like hair dryers, styling irons, and beard trimmers are also regularly used by barbers.

Digital technology has now taken barber tools to the inevitable next level, with clippers and trimmers featuring adjustable settings, digital displays and wireless connectivity. Even the furniture is a big draw for clients, with barber chairs now commonly equipped with massage features and adjustable settings. In recent years, there has also been a growing trend towards eco-friendly and sustainable barber tools, including reusable safety razors and brushes with synthetic bristles.

The evolution of barber tools reflects today’s priorities of efficiency, safety, and high-quality client experiences. Barbers now have access to a wide range of specialised tools and equipment, allowing them to offer a diverse range of grooming services to meet customer demands.


Get Barbers Insurance with Protectivity

Whether you’re a self-employed, mobile or freelance barber, protection against life’s unexpected events is essential. As a professional business, having peace of mind is essential to be able to focus on doing the best for your clients. This means having the right barber insurance.

You can access this for as little as £3.76 a month with Protectivity’s specialist Barber Insurance. Operate confidently with a range of policy options, including public liability as standard. This offers cover should a member of the public bring a claim against you, up to a total of £10 million. Equipment cover provides up to £12,000 of compensation, while personal accident cover is designed for loss of income if you’re unable to work. You can also choose Employers’ Liability if you’re responsible for members of staff.

Get a tailored quote for hairdressing insurance now and find out how we can support you and your business. Contact our friendly team if you have any questions at all.

Get Barbers Insurance from Protectivity


*Disclaimer – This blog has been created as general information and should not be taken as advice. Make sure you have the correct level of insurance for your requirements and always review policy documentation. Information is factually accurate at the time of publishing but may have become out of date. 

Last updated by

Bee Ingram Image

Bee Ingram

With a focus on producing high-quality, consistent content across multiple platforms, Bee is committed to creating engaging and effective messaging that aligns with the brand’s voice and strategy.